This new slide transition lets you apply animations during the transition of one slide to another. With Morph it is possible to make objects, pictures, charts move. In fact you transition gradually from one object to the next.
You can also use Morph to create a zoom effect. See my previous article:
Move and enlarge a picture and return to the same size using morphing
How do you handle it?
- First add the content on your slide.
- Then copy the original slide as many times as necessary.
- On the copies move, enlarge, rotate or change your objects from colour.
- Finally apply the Morph transition using the Transition tab.
Morph with objects
Morph with shapes
Morph is easiest to use when you use the same shapes. You can morph one shape into another shape but then you need a workaround. Morphing a rectangle in a parallelogram is therefore more difficult but not impossible, more on that in a later article.
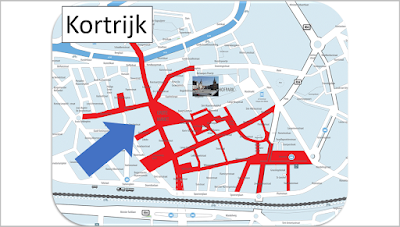
Below is an example of a city map where you want to show the places of interest by zooming in on them with an arrow pointing to a picture. Here is the first slide.
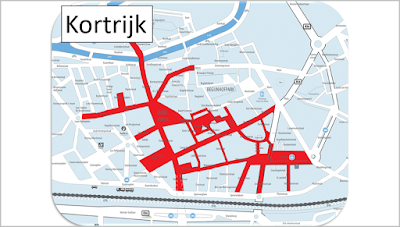
Next you copy the first slide three times. You can do that quickly by right clicking the slide and choosing Duplicate slide. Or you can apply the keyboard shortcut Alt+Shift+D. Remove the text box Kortrijk from slide 2-4.
We want the arrow and picture to appear gradually on slide two whilst changing size and position. So we need to put both objects on slide one in the background, increase the size of the arrow and decrease the size of the picture. That way Morph will have its full effect. To move them to the background under Picture Tools/Drawing tools use the Shape Format tab - button Send backward - Send to back.
 |
| Increased/decreased size of the objects slide 1 |
 |
| Objects in the background on slide 1 |
On slide two, put the two objects back in front. This time use Bring forward and Bring to front.
On slide 3 you need to change the picture using the Format tab under Picture tools, click on the Change picture button in the Adjust group, choose From a file and navigate to the folder where the picture resides and insert it. Move and rotate the arrow. Repeat the same process for slide 4.
Finally go to the Transition tab and select slides 2-4. Click on the Morph transition icon. By default morph is applied on objects. You can see that when you click the Effect options button in the Transition group.
In the Timing group you can adjust the duration if you want.
Watch the result in this video:
As you can see the Morph effect is the clearest on slide two. The arrow and picture change size. On the other slides the effect is limited to the movement and rotation of the arrows. The pictures do not morph. If you want this to happen you will have to read one of my next articles where I explain how to morph pictures.


Geen opmerkingen:
Een reactie posten