donderdag 27 augustus 2020

Play a video across multiple slides in PPT 2019

Go to the slide where you want the video to begin playing. Insert the video clip by going to Insert, Video, Video on my PC.
Select the video clip, under Video Tools click the Playback tab. In the Video Options group click the drop-down list next to Start and select Automatically.


Now click on the Animations tab, and choose the Animation pane button. In the animation pane double click the play entry.

In the dialog Play video, under stop playing activate the radio button After and enter the number of slides the video should play or put the maximum 999 so that the video will not stop. Finally click OK.


Be aware that the video will always play on top of the slide.

zaterdag 22 augustus 2020

Use a PPT (color) theme in Excel - PPT 2019

If you create a new color theme in PPT you can use it in other Office programs like Excel and Word.

First you design the new theme in PPT. There are two ways you can do that.

Either go to View - Master - select the master which is on top of the list. In the Background group click on the list arrow next to Colors and select Customize colors at the bottom.


Or on the Design tab in the Variants group click the more drop-down arrow and choose Colors, and then Customize colors.


The first four color boxes are meant for text and the color background of the slide. You have light text on a dark background and dark text on a light background. Color box 1 (dark 1) is the color of the main text, Color box 2 (light 1) is the color of the background of the slide, usually white, color box 3 (dark 2- is for the color of secondary text, color box 4 (light 2) is the background color for dark text.

The next 6 color boxes contain the accent colors for shapes, tables, graphs, SmartArt. In the example above  I changed the 6 accent colors.

At the bottom of the dialog type the name of the new color theme. If you wish you can also change the Font or Effects of the theme in the same group.

If all the colors have been set you can save your new theme. In the Edit themes group click on the Themes button and select Save current theme option. Or click on the Design tab and in the Themes group click the More button and then Save current theme.


You will automatically land in the Document themes folder. Give your theme a name and hit Save. Be aware that if you do not save the theme in the default folder it will not show up in the gallery.

Now, when you click the Theme button (slide master) or when you choose Design and the More button you will see a custom section with your new theme in it.


Start Excel and open and existing or a new workbook. Go to Page layout tab, click on the Themes button in the group Themes. Select your new PPT theme. Now all the colors have changed.
Below a video demonstrating the principle.


maandag 17 augustus 2020

Een PPT (kleuren)thema gebruiken in Excel - PPT 2019

Een thema dat je ontwerpt in PPT kan in andere Office programma's worden toegepast.

Eerst ontwerp je het nieuwe thema in PPT. Ga daarvoor naar Beeld - Diamodel - selecteer het model helemaal bovenaan. In de groep Achtergrond, kies je bij Kleuren het lijstpijltje en je selecteert onderaan Kleuren aanpassen.


Of  je kiest voor het tabblad Ontwerpen en in de groep Varianten klik je op de Meer knop. Je kiest voor Kleuren en vervolgens voor Kleuren aanpassen.


De eerste vier kleurvakjes hebben te maken met tekst en de dia-achtergrond, met name lichte tekst op donkere achtergrond en donkere tekst op lichte achtergrond. Kleurvakje 1 (Donker 1) is de kleur van de hoofdtekst, kleurvakje 2 (Licht 1) is de kleur van de achtergrond van de dia meestal wit dus, kleurvakje 3 (Donker 2) is de kleur van secundaire tekst, kleurvakje 4 (Licht 2) is de kleur van  tekst op een donkere achtergrond.

De volgende 6 kleurvakjes bevatten de accentkleuren voor vormen, tabellen, grafieken, SmartArt en dergelijke. Deze heb ik hier in het bovenstaand voorbeeld een nieuwe kleur gegeven. De laatste twee kleuren slaan op het gebruik van hyperlinks.

Onderaan het dialoogvenster typ je de naam van het nieuwe thema en je klikt op de knop Opslaan. Indien je dat wenst kan je ook de lettertypes en effecten aanpassen.


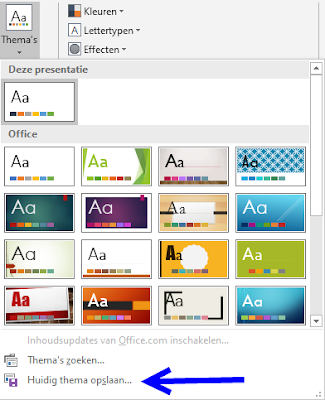
Eens alle kleuren ingesteld kan je het nieuwe thema bewaren. In de groep Thema's bewerken kies je de knop Thema's en onderaan klik je op Huidig thema opslaan. Of  je kiest voor het tabblad Ontwerpen en in de groep Thema's klik je op de Meer knop en je kiest voor Huidig thema opslaan. 


Knop thema's in diamodel

Je komt automatisch terecht in de map Document themes, geef je thema een naam en klik op Opslaan. Hou er wel rekening mee dat als je het thema niet opslaat in de standaardmap deze niet in de galerij op het lint zal opduiken.

Wanneer je nu klikt op de knop Thema's (in het diamodel) of op de knop Meer (in het tabblad Ontwerpen) zie je onder de rubriek Aangepast het nieuwe thema staan.


Start nu Excel op en open een bestaande/nieuwe werkmap. Ga naar het tabblad Pagina-indeling en klik op de knop Thema's in de groep Thema's. Klik op je gemaakt thema en je ziet dat meteen alle kleuren veranderen.


Hieronder een video met het toepassen van het thema in een bestaande werkmap van Excel en het effect ervan:


maandag 10 augustus 2020

Verander de standaard start dia-indeling (Titeldia) in PPT 2019

Bij het opstarten krijg je bij PPT standaard altijd de dia-indeling Titeldia. Wanneer je vervolgens opnieuw op de knop Nieuwe dia klikt dan krijg je standaard de dia-indeling Titel en object. 


Standaardinstelling: eerst titeldia dan titel en object

Wanneer je toch wil starten met een andere dia-indeling dan zal je de dia-indeling van je keuze moeten veranderen in het diamodel van je presentatie/sjabloon. Het heeft weinig zin dat voor iedere nieuwe presentatie te doen, beter is van een ontwerpsjabloon te maken dat je kan gebruiken als vertrekbasis. 

Ga daarvoor naar Beeld - Diamodel en sleep met de dia-indeling van je keuze, laat los op de eerste positie onder het diamodel dus net boven de huidige dia-indeling TiteldiaVerplaats de dia-indeling Titeldia zodat die bv. in derde positie komt. Hieronder zie je een voorbeeld waar de indeling Leeg als eerste is geplaatstSluit het diamodel af met de knop Modelweergave sluiten.


De indeling Leeg als eerste dia-indeling


Eens terug in je presentatie klik je op de knop Indeling en klik je op de nieuwe eerste dia-indeling Leeg. De nieuwe dia-indeling verschijnt. 


Bewaar nu je diamodel als een sjabloon. In het dialoogvenster Opslaan als kies je in de lijst Opslaan als voor PowerPoint sjabloon (*.potx). Dat brengt je naar de map die je in de opties van PowerPoint (Start - Opties - Opslaan - standaardlocatie...) hebt aangeduid als standaardlocatie voor persoonlijke sjablonen. 


Bij het aanmaken van een nieuwe presentatie gebaseerd op je sjabloon (Start - Nieuw - Privé) zal je nu de nieuwe dia-indeling als eerste krijgen. Klik je op de knop Nieuwe dia dan verschijnt de titel en object dia-indeling.


Je kan ook zelf een dia-indeling aanmaken in het diamodel, via de knoppen Indeling invoegen en Tijdelijke aanduiding invoegen. Deze indeling kan dan als eerste dia-indeling fungeren. Pas daarvoor de procedure toe zoals hierboven is beschreven.


woensdag 5 augustus 2020

Change the default start layout (Title slide) in PPT 2019

When you start a presentation in PPT by default you always get the Title slide layout as the first layout. When you click the New slide button the Title and content layout follows. That is the way PPT works.


Default setting


You can alter this to start with the layout you prefer. It makes no sense to do this for every new presentation you start. It is better to create a template that you can use as starting point.

Go to View - Master and drag the slide layout of your preference to the position just under the master. Then move the Title slide layout to position three or any other position you prefer. See the example below. Close the slide master by clicking on the Close master view button.


Blank layout as the first layout
Once you have returned to your presentation remove the old title slide and click on the New slide button. The new slide layout you chose appears as the first layout. 


Now save your master as a template. In the Save as dialog click the list arrow next to save as and choose PowerPoint template (*.potx). PPT will take you to the folder you specified as your personal default (File - Options - Save - Default personal templates location).

When you create a new presentation based on your template (File - New - Custom) you will now get your preferred slide layout. Clicking on the New slide button will result in a Title and content layout.


It is possible to create your own layout in the master and use this as your preferred slide layout. On the Slide master tab, click the Insert layout and Insert placeholder buttons. Then follow the procedure described above.