donderdag 20 december 2007

Insert Flash movie into PPT 2007 - Een Flash video invoegen in PPT 2007

Insert Flash movie

To be able to use a Flash movie you will have to show the developers tab on the ribbon. To do so click on the Office-button, choose Options for PowerPoint, in the Popular category check 'Show developers tab on the ribbon'.

Click on the Developers tab. Click on the More controls button.
Choose Shockwave Flash Object in the list of objects and hit OK.

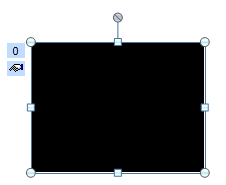
Now drag a box on your slide the size you want the movie to be.

Click on the Properties button.

Click on the tiny little button next to customize.

Fill in the path to the movie and check the embed movie box. Hit OK.

Now all you have to do is start the presentation and your Flash movie will play.

Flash video invoegen in PPT 2007

Om een Flash video te kunnen invoegen moet je eerst het tabblad Ontwikkelaars activeren.
Om dat te doen klik je op de Office-knop. Kies knop Opties voor PowerPoint. Onder de rubriek Populair zet je een vinkje bij 'Tabblad Ontwikkelaars op het lint weergeven' en klik OK.
Selecteer het tabblad Ontwikkelaars.

Klik op de knop Meer besturingselementen in de groep Besturingselementen.


Kies in de lijst met objecten, Shockwave Flash Object en klik OK.


Sleep een vak op de dia waar de Flash video moet afspelen.
Klik op de knop Eigenschappen.

Klik naast Aangepast op het kleine knopje.


Naast het vak 'Movie Url' vul je het pad in waar de video zich bevindt.
Kruis het vakje 'Embed movie' aan en klik op OK
.


Nu ben je klaar om de presentatie te starten en het filmpje te bekijken.

dinsdag 11 december 2007

How can I use PPT 2003 slide designs in PPT 2007 - Hoe kan ik diaontwerpen uit PPT 2003 gebruiken in PPT 2007

Is it possible to use slide designs from PPT 2003 in PPT 2007?

You can easily use designs from PPT 2003 in PPT 2007. Select the design in PPT 2003 in the templates folder and copy it to the corresponding templates folder in PPT 2007.

If you want to know where that folder is, start a new presentation and save it, in the 'save as list' choose 'PowerPoint template.potx'. Take note of the path and copy the PPT 2003 template in that folder.

To use it, click on 'Office button' - choose 'New' - then in the 'My templates' category select your template. Click OK. And you are done.

You may want to save that template as a theme. Apply the template to a new presentation. On the 'Design' tab in the ribbon, in the 'Themes group', click the 'More' button. At the bottom of the screen choose 'Save current theme'. You will find yourself in the 'Document themes' folder. Give it an appropriate name and click save. The theme will show as a theme under the custom category.

Is het mogelijk om diaontwerpen uit PPT 2003 te gebruiken in PPT 2007?

Je kan diaontwerpen uit PPT 2003 gemakkelijk gebruiken in PPT 2007. Selecteer het diaontwerp in PPT 2003 en kopieer het naar de corresponderende map in PPT 2007.

Als je wil weten waar die map zich bevindt maak dan een nieuwe presentatie en sla ze op. In de lijst opslaan als kies je voor 'PowerPoint-sjabloon.potx'. Noteer het pad en kopieer het ontwerpsjabloon in die map.

Om het ontwerp toe te passen klik je op de Office-knop, je kiest voor Nieuw en vervolgens voor de link 'Mijn sjablonen', selecteer het sjabloon en klik OK.

Je kan overwegen van het ontwerpsjabloon ook als een thema weg te schrijven. Pas het sjabloon toe zoals aangegeven. In het lint klik je op het tabblad Ontwerpen, klik op de knop Meer in de groep 'Thema's'. Onderaan het scherm kies je voor 'Huidig thema opslaan'. Je komt automatisch terecht in de map 'Document themes'. Geef een naam aan het nieuwe thema. Het komt nu terecht onder de rubriek aangepast in de groep 'Thema's'.

maandag 10 december 2007

Changed open file dialog PPT 2007, where is preview? - Gewijzigd dialoogvenster Openen PPT 2007, waar is voorbeeldweergave?

Where is preview gone?

This is how it looked in PPT 2003.

It's still there, just click on Organize, choose Layout and Preview. Select the file you want to see in the files directory.
No image, something is wrong ? Probably a bug, let's hope it gets fixed in SP1. Strange thing is, if you view it in Windows Explorer it shows up just fine.

Waar is de weergave 'voorbeeld' terug te vinden?


Zo zag het eruit in PPT 2003:


De voorbeeldweergave is nog steeds aanwezig maar je moet er wel naar op zoek.
Klik op 'Organiseren (1), Indeling (2) en klik op Voorbeeldvenster (3). Selecteer de presentatie in de bestandenlijst. Blijkbaar geen resultaat (4), enkel afbeeldingen lijken hier te worden getoond.
 
Hoogstwaarschijnlijk een bug die hopelijk opgelost geraakt in SP1. In Windows verkenner daarentegen wordt het voorbeeld wel goed getoond.

dinsdag 4 december 2007

Changed open file dialog PPT 2007, path - Gewijzigd dialoogvenster Openen PPT 2007, documentpad.

Document path in PPT 2007

Another nifty change is the document path, in PPT 2003 you could find it by clicking on the listarrow next to 'search for'.

In PPT 2007 it is right there on top of the dialog. Always visible.

When you click the tiny arrow in the path just in front of each subfolder you are immediately presented with all subfolders on that level. Then just click on the subfolder you want to see and you are there.

Now you can also copy the path or convert it to text so you can easily insert it in your presentation. Just right click the path and choose from the quick menu.

Documentpad in PPT 2007


In PowerPoint 2003 kon je het volledige documentpad enkel te zien krijgen als je klikte op het lijstpijlje naast zoeken in.


In PowerPoint 2007 staat het volledige pad steeds zichtbaar bovenaan het dialoogvenster.


Wanneer je klikt op het kleine pijltje naast een van de submappen uit het pad krijg je meteen alle mappen die op dat niveau aanwezig zijn. Een enkele klik en je bent in de submap van je keuze.


Je kan nu bovendien het documentpad als tekst kopiĆ«ren zodat je dit gemakkelijk in een presentatie kan gebruiken. Het volstaat van rechts te klikken op het pad en te kiezen uit het gepresenteerde snelmenu.


zaterdag 1 december 2007

Changed open file dialog PPT 2007, layout (2) - Gewijzigd dialoogvenster Openen PPT 2007, indeling (2).

Rearrange the columns in the Open file dialog.

Sometimes you would like a column header to be in another place. Well do not despair just drag the column header where you want it to be.
See 'Figuur 1'

Sometimes it is difficult to see what is in a column as the width does not adapt to the contence. Right click the column header and choose 'Size column to fit' or 'Size all columns to fit'.
See 'Figuur 2'

Finally, you are not limited to the columns you see ordinarily in the view. Just right click on the column header and choose a different category in the list or click 'More' which gives you the opportunity to choose from dozens of categories some of which you never knew they existed.
See 'Figuur 3 en 4'

Herschikken van de kolommen in het dialoogvenster Openen.

De volgorde van de kolommen zoals die wordt gepresenteerd is niet altijd deze die je zelf zou wensen. Geen probleem, sleep met de kolomkop en laat die los op de plaats die de kolom moet innemen.
Figuur 1


Soms is het vervelend wanneer niet alle informatie in de kolom direct zichtbaar is. Om de breedte van de kolom aan te passen aan de inhoud doe je het volgende. Rechtsklikken op om het even welke kolomkop en kiezen voor kolom passend maken of alle kolommen passend maken.
Figuur 2
 
Je hoeft je niet te beperken tot de detailinformatie die standaard wordt aangeboden. Rechtsklikken op de kolomkop, kies voor een andere categorie uit de lijst of kies de knop Meer. De lijst van mogelijkheden is hƩƩl uitgebreid.
Figuur 3


donderdag 29 november 2007

Save a part of a picture as a new picture PPT 2003 - 2007 - Een gedeelte van een afbeelding bewaren als een nieuwe afbeelding PPT 2003 - 2007

PPT 2003 - Use a part of a picture to save it as a new picture

  1. Start a new presentation, give the presentation your picture as the background.
  2. Do this by going to Format - Background, click on the listarrow, choos Fill effects, Picture tab, select Picture button, select picture, click Insert, OK, Apply.
  3. Now draw a shape using the curve tool, carefully following the contour of the part you want to use. On the Drawing toolbar, AutoShape button, Lines, Free form, double click to close the shape.
  4. Rigth-click on the new shape, Format Autoshape, listarrow next to Colour, Background.
  5. Finally right-click the shape again, in the menu choose Save as picture, give it a name and save it.

PPT 2007 - Use a part of a picture to save it as a new picture
  1. Start a new presentation, give the presentation your picture as the background.
  2. Choose the 'Design' tab on the ribbon, in the 'Background' group choose the 'Background styles' button and near the bottom click on 'Edit background'.
  3. Choose radio button 'Picture fill' and click on 'File' button, browse and insert the picture. (see 'Figuur 1)
From this background I would like to extract only the windmill, preferably in the form of a puzzle piece.
  1. Draw a shape surrounding the windmill using the 'Curve' tool. Insert tab on the ribbon - Shape - Curve (under the lines section).
  2. Trace the contour of the windmill and do not forget to close the shape by double clicking. (See 'Figuur 2)
With the shape still selected, right click it and perform the following steps:
  1. On the 'Format' tab under 'Picture tools', under the 'Shape styles' group click the dialog starterbutton 'Shape styles'. Choose Fill and select the radio button 'Background style for slide'. That way the shape will inherit that part of the background picture.
  2. Now right click the shape and choose 'Save as picture'. Give the child a name and you are done. (See 'Figuur 3'). You can see the result in 'Figuur 4'.
PPT 2003 Deel van een afbeelding als een nieuwe afbeelding opslaan
  1. Start een nieuwe presentatie, geef de dia de bewuste afbeelding als achtergrond.
  2. Doe dit via 'Opmaak – Achtergrond' – klik op het lijstpijltje – selecteer 'Opvuleffecten' – tabblad 'Afbeelding' – knop 'Afbeelding selecteren' – selecteer de afbeelding en klik op 'Invoegen' – OK – Toepassen.
  3. Teken nu een vorm met het tekengerief curve rondom het gedeelte van de afbeelding die je wil gebruiken. Werkbalk Tekenen - knop AutoVormen – Lijnen - Vrije vorm. Dubbelklik om een gesloten vorm te krijgen.
  4. Rechtsklik op de nieuwe vorm – AutoVorm opmaken – lijstpijltje naast Kleur - kies Achtergrond. Zo krijgt de vorm als vulling de onderliggende foto.
  5. Rechtsklik op de vorm – kiezen voor 'Opslaan als afbeelding' – naam geven - opslaan.

PPT 2007 - Deel van een afbeelding als een nieuwe afbeelding opslaan.
  1. Start een nieuwe presentatie, geef de dia de bewuste afbeelding als achtergrond.
  2. Doe dit via tabblad 'Ontwerpen' op het lint, in de groep 'Achtergrond' kies je de knop 'Achtergrondstijlen'.
  3. Kies hier 'Achtergrond opmaken' - Opvullen met figuur of bitmappatroon – knop Bestand – Selecteren – InvoegenSluiten.
Figuur 1

Uit deze achtergrond zou ik alleen de molen willen halen. Liefst in een soort van puzzelstukje.
  1. Teken een vorm met het tekengerief Curve rondom het gedeelte van de afbeelding die je wil gebruiken. Invoegen – Vorm – Curve (onder rubriek lijnen).
  2. Traceer het gedeelte dat je wil gebruiken en dubbelklik om een gesloten vorm te krijgen.
Figuur 2
Met de geselecteerde vorm doe je nu het volgende:
  1. Tabblad 'Opmaak' onder 'Hulpmiddelen voor tekenen', groep 'vormstijlen', klik op dialoogstarterknop, kies 'Opvulling' en klik het keuzerondje 'Achtergrondopvulling voor dia' aan. Zo krijgt de vorm als vulling de onderliggende foto.
  2. Bewaar nu als een afbeelding door rechts te klikken op de vorm en te kiezen voor 'Opslaan als afbeelding'. Geef het kind een naam en je bent klaar.
Figuur 3
  
Zo ziet de afbeelding eruit wanneer je ze gebruikt in een presentatie:
Figuur 4


Changed open file dialog PPT 2007, layout - Gewijzigd dialoogvenster Openen PPT 2007, indeling.

A few tips to improve the layout of the open dialog: you can adjust the width of each part easily, just drag the two headed arrow that appears when you hover over the border.
 
Enkele tips voor een aangenamer gebruik van het venster, alle onderdelen zijn individueel aan te passen qua breedte en hoogte, het volstaat van te slepen met de dubbele pijl wanneer je de cursor beweegt over de rand van een onderdeel.

When you got a lot of files in the folder and you want to see a maximum of files, just double click in the title bar of the dialog. The dialog will be maximized.
 
Als je heel veel bestanden in een folder hebt staan en je wil er zoveel mogelijk zien, dubbelklik in de titelbalk van het dialoogvenster en het zal gemaximaliseerd worden.

woensdag 28 november 2007

Changed open file dialog PPT 2007, sort, filter and group - Gewijzigd dialoogvenster Openen PPT 2007, sorteren, filteren en groeperen.


Make it easy on yourself sort, filter and stack in the open file dialog.

It is easy to sort the contents of a folder, just click on the header at the top of the column. Nothing changed there you will say, yes, but now you can sort in whatever view you have chosen. In Windows XP you could only sort when in the details view.

See 'Figuur 1' below.

If you want to filter the content of the folder, click on the listarrow (1) next to the header above the column. Check the box of your choice (2). See the filtered result appearing (3).

See 'Figuur 2' below.

If you want to group the files together, click on the listarrow (1) next to the header of your choice and choose 'Group' (2). The contence will be grouped accordingly (3).
 
See 'Figuur 3' below
 
If you want to stack the files in the folder, click on the listarrow next to the header of your choice (1), choose 'Stack by name' (2), see the result appear (3).
See 'Figuur 4' below

It is a good idea to change the view to large thumbnails. In the toolbar click on the listarrow next to view and choose large icons.
 
See 'Figuur 5' below
 
Maak het jezelf gemakkelijk sorteer, filter en stapel in het dialoogvenster Openen.
 
Het is gemakkelijk om de inhoud van een map te sorteren in het dialoogvenster 'Openen'. Het volstaat om op de kolomkop te klikken om te sorteren. Niets nieuws onder de zon zal je zeggen. Maar nu kan je in om het even welke weergave sorteren. In Windows Xp kon je dat alleen wanneer je de details weergave koos.
Figuur 1


Wil je de inhoud van een map filteren. Klik dan op het lijstpijltje naast de kolomkop (1) en kies het aankruisvakje van je keuze (2). Bekijk het resultaat (3).
 
 
Figuur 2


Als je de bestanden wil groeperen. Klik op het lijstpijltje naast de kolomkop (1) van je keuze en kies voor groeperen (2). Bekijk het resultaat (3).
 
Figuur 3
 

Wil je de inhoud van de map stapelen. Klik op het lijstpijltje naast de kolomkop (1) en kies voor 'Stapelen volgens naam kolomkop' (2). Bekijk het resultaat (3).
 
 
Figuur 4

Het verdient aanbeveling van de weergave wat groter te zetten zodat de verschillende categorieƫn duidelijker zijn. Klik daarvoor op de lijstpijl naast het item 'Beeld' uit de werkbalk en kies voor 'Grote pictogrammen'.
 
Figuur 5

maandag 26 november 2007

Changed open file dialog PPT 2007, what's new? - Gewijzigd dialoogvenster Openen PPT 2007, wat is nieuw?

Open dialog: what is new?
 
Here are the first novelties on the open dialog.  See picture below.
  1. Browse buttons, go back and forward, just like in Internet Explorer.
  2. Full path of the actual folder always visible.
  3. Search field, allows you to quickly search for any PowerPoint file quickly and effectively.
  4. Favourites, easy accessable, customizable.
Next time we will see the new sorting and selecting possibilities.

Dialoogvenster Openen: wat is nieuw?

Hier zijn de eerste nieuwe zaken.
  1. Bladerknoppen net als in Internet Explorer.
  2. Volledige pad van de actuele map altijd zichtbaar.
  3. Zoekveld, laat je toe van snel om het even welk PowerPoint bestand terug te vinden.
  4. Favorieten, gemakkelijk bereikbaar, aanpasbaar.

De volgende keer behandelen wij de nieuwe sorteer en selectiemogelijkheden.

zondag 25 november 2007

Changed open file dialog PPT 2007 (Vista - Office 2007) - Gewijzigd dialoogvenster Openen PPT 2007 (Vista - Office 2007)

Open file dialog has changed in Office 2007 and Windows Vista

Below is how it looked in Office 2003 and Windows XP

Dialoogvenster Openen is drastisch gewijzigd in Office 2007 en Windows Vista. Zo zag het eruit in Office 2003 en Windows XP.


This is how it looks in Office 2007 and Vista:
Zo ziet het eruit in Office 2007 en Vista:


I will try to point out what's new and improved in the next blog entries. So keep in touch.

Ik zal proberen in enkele volgende bijdragen een overzicht te geven van wat nieuw en verbeterd is. Dus hou contact.

vrijdag 16 november 2007

Play music on click, alter ugly loudspeaker icon - Muziek afspelen met gewijzigd luidspreker pictogram


Get rid of the ugly loudspeaker in PPT 2007-2010 - music plays on click - method 2


In PPT 2007-2010 you can change the image of the loudspeaker icon easily, in fact you can have any image that acts as the initiator of the music. Moreover you will not loose any formatting or animation if you change the picture.

Select the loudspeaker icon, under 'Picture tools' (2007) or under 'Audio tools' (2010) click the 'Format' tab (2007-2010), in the 'Adjust' group click the 'Change picture' icon, browse and select your new picture. That is all there is to it. Right-clicking the speaker icon and choosing Change picture can accomplish the same.

Het lelijke pictogram kwijtgeraken bij het invoegen van een muziekbestand dat moet afspelen in een presentatie door erop te klikken - methode 2

In PPT 2007-2010 kan je om het even welke afbeelding vervangen door een andere. Zonder daarbij enige opmaak of animatie te verliezen.

Selecteer het luidspreker icoontje, onder 'Hulpmiddelen voor afbeeldingen' (2007) of onder 'Hulpmiddelen voor audio' (2010), klik je op de 'Opmaak' tab. In de groep 'Aanpassen' klik je op het icoontje 'Afbeelding wijzigen'. Zoek je nieuwe afbeelding en voeg ze in via de knop 'Invoegen'. Rechts klikken op het luidspreker icoon en kiezen voor Afbeelding wijzigen kan natuurlijk ook.


Meer is er niet nodig. Hierna een voorbeeld:


donderdag 15 november 2007

Play music on click, with action button - Muziek afspelen via actieknop

Get rid of the ugly loudspeaker in PPT 2007-2010 - music plays on click method 1

Once in a while you prefer to start the music file by clicking on it. That leaves the ugly loudspeaker icon exposed for everyone to see.

You can get round this by attaching the sound file to any other suitable object on your slide, preferably a picture or autoshape.

Only audio files from the wav type can be used.


Here is how you go about it:
  1. First select the Picture/AutoShape you want to add the sound file to.
  2. Go to 'Insert' tab on the ribbon, in the 'Links' group click the 'Action' button.
  3. Now click 'play sound' checkbox, click on the listarrow and choose 'other sound' right at the bottom of the list. Browse to your sound file and insert it.
  4. OK.
  5. Now all you have to do is click on the picture to hear the sound.
Het lelijke pictogram kwijtgeraken bij het invoegen van een muziekbestand dat moet afspelen in een presentatie door erop te klikken - methode 1
Nu en dan wil je een muziekbestand afspelen tijdens een presentatie door erop te klikken. Dat laat het lelijke pictogram zichtbaar voor iedereen.
Dat kan je vermijden door het muziekfragment via een actie-instelling te koppelen aan een afbeelding of AutoVorm.

Alleen audio bestanden van het type wav kunnen daarvoor gebruikt worden.
Zo ga je tewerk:
  1. Selecteer de afbeelding of AutoVorm waar je het geluid wil aan koppelen.
  2. Ga naar het tabblad 'Invoegen' op het lint, in de groep 'Koppelingen' klik je op het pictogram 'Actie'.
  3. Selecteer het aankruisvakje 'Geluid afspelen', klik op de lijstpijl en kies 'Ander geluid'. Selecteer het geluid en voeg het in.
  4. Kies OK.
  5. Het enige wat je nu nog moet doen is klikken op de afbeelding en het geluidsfragment zal spelen.

woensdag 14 november 2007

Play music automatically without seeing the ugly loudspeaker icon (2) - Muziek automatisch afspelen zonder zichtbaar luidspreker pictogram (2)

Get rid of the ugly loudspeaker in PPT 2007-2010 - method 2

The second method opts to not show the icon while the presentation is running.
Once you have inserted the sound file, select it if necessary, under 'Sound tools' click the contextual tab 'Options' (2007) or 'Playback' (2010). In the 'Audio options' group click the checkbox, 'Hide during show'.


Once you have started the presentation the icon will not show and the music will play.
Next time we will give some alternatives to hide the icon when you want the music to be played on click.

Het lelijke pictogram kwijtgeraken bij het invoegen van een muziekbestand in een presentatie - methode 2.
De tweede methode bestaat erin het pictogram te laten verdwijnen tijdens de presentatie.
Nadat het muziekfragment is ingevoegd, selecteer het indien nodig.
Onder 'Hulpmiddelen voor geluiden (2007) of  Hulpmiddelen voor Audio (2010)' klik je op het tabblad 'Opties' (2007) of Afspelen' (2010).
In de groep 'Geluidsopties' kruis je het vakje 'Verbergen bij voorstelling' (2007) of 'Verbergen tijdens weergave' (2010) aan.

De volgende keer geven wij een tweetal alternatieven om het pictogram te verbergen wanneer er moet op geklikt worden om de muziek te laten spelen.

dinsdag 13 november 2007

Play music automatically without seeing the ugly loudspeaker icon (1) - Muziek automatisch afspelen zonder zichtbaar luidspreker pictogram (1)

Get rid of the ugly loudspeaker in PPT 2007/2010 - method 1

There are a number of ways to get rid of the loudspeaker icon you get upon inserting sound files in your presentation.
The easiest way to get rid of it simply dragging it in the grey (PPT 2003)/blue (PPT 2007-2010) area surrouding the slide.
Tomorrow, I'll give you another solution to the same problem.


Het lelijke pictogram kwijtgeraken bij het invoegen van een muziekbestand in een presentatie - methode 1.
Er zijn een aantal manieren om het pictogram kwijt te raken. De gemakkelijkste manier is het gewoon wegslepen naar de grijze (PPT 2003) /blauwe (PPT 2007-2010) ruimte rondom de dia.
Morgen geef ik een nieuwe oplossing voor hetzelfde probleem.

zaterdag 22 september 2007

You tube add-in for PowerPoint - You tube add-in voor PowerPoint

Shyam Pillai, MVP, has written a free add-in to integrate 'You tube' movies into a PowerPoint presentation.

Here's the link:

http://skp.mvps.org/youtube.htm

Shyam Pillai, MVP, heeft een nieuwe gratis add-in geschreven om 'You tube' video's op te nemen in een PPT-presentatie.

Hier is de link:

http://skp.mvps.org/youtube.htm

Service pack 3 for Office 2003 - Service pack 3 voor Office 2003

Microsoft just released Microsoft Office 2003 Service Pack 3. The service pack includes several security updates and has all the updates from service pack 1 and 2.

You can find it here:

http://www.microsoft.com/downloads/details.aspx?FamilyId=E25B7049-3E13-433B-B9D2-5E3C1132F206&displaylang=en

Microsoft heeft zojuist service pack 3 voor Office voor download beschikbaar gesteld. Service pack 3 bevat alle updates van service pack 1 en 2.

Kan je hier dowloaden:

ttp://www.microsoft.com/downloads/details.aspx?FamilyID=85af7bfd-6f69-4289-8bd1-eb966bcdfb5e&DisplayLang=nl


vrijdag 24 augustus 2007

Een PowerPoint show met Windows Mediaplayer afspeellijst in achtergrond - deel 3/PowerPoint show with Windows Media Player playlist in background - part 3

Windows Media Player list as background to a PowerPoint show (PPT 2007) -
part 3

Now that we successfully inserted the playlist it is time to let the show run automatically and loop.
  1. Select all slides in the Outline tab.
  2. In the ribbbon click on the 'Animations' tab.
  3. In the 'transition to this slide' group next to advance automatically after choose the appropriate timing you want the slide to transition.
  4. Click on the 'Apply to all button' in the same group.
    If you want you can also choose a suitable transition in the transition gallery. Don't forget to click the 'Apply to all' button again if you do so.
  5. Now click on the Slide show tab in the ribbon, in the 'Set up' group choose 'Set up slide show' button.
  6. Click on the radio button 'Browsed at a kiosk' and hit OK.
That's all there is to it.


Windows Media Player afspeellijst als achtergrond bij een PowerPoint voorstelling  (PPT 2007) - deel 3
De afspeellijst is nu toegevoegd aan de eerste dia. De lijst zal automatisch afspelen gedurende de voorstelling. Het is nu tijd om de voorstelling automatisch te laten lopen met de gewenste timing.

  1. Selecteer alle dia's in het overzichtsvenster.
  2. Klik op de tab 'Animaties' op het lint.
  3. In de groep 'Overgang naar deze dia' stel je naast 'Automatisch na' het gewenste altijd seconden gedurende dewelke de dia moet getoond worden.
  4. Klik op de knop 'Op alles toepassen' in dezelfde groep.
  5. Als je dat wenst kan je ook een overgangseffect kiezen in de galerij. Vergeet niet opnieuw op de knop 'Op alles toepassen' te klikken.
  6. Kies nu de tab 'Diavoorstelling' op het lint, in de groep 'Instellen' klik je op de knop 'Diavoorstelling instellen'.
  7. Klik op het keuzerondje 'Bekeken in een kiosk' en klik OK.
Zo, je bent klaar, start de presentatie en geniet. Dit is bij uitstek geschikt voor grote voorstellingen met foto's.

donderdag 23 augustus 2007

Een PowerPoint show met Windows Mediaplayer afspeellijst in achtergrond - deel 2 (PPT 2007)/PowerPoint show with Windows Media Player playlist in background - part 2

Windows Media Player list as background to a PowerPoint show (PPT 2007) -
part 2


Now that we have selected the playlist and have choosen to play it automatically we will finetune the animation.
  1. Go to the custom animation taskpane (if it is not visible, click the Animation tab in the ribbon, in the 'Animation' group click on the Custom animation button).
  2. Double click the entry for the animation of the playlist. Be careful to choose the play action item and not the stop action item.
  3. Choose the effect tab, and in the stop playing group click the 'After' radio button and choose the number of slides in your presentation. Or put in the maximum number of 999 so that the music will not stop even when the show is looped.
Now, how to get rid of the black object in the centre of the slide. Well you can resize it and drag it into place if you want it to be visible.

Or if you do not want to see it at all, resize it and drag it into the grey area surrounding the slide. If necessary you can use the zoomslider in the bottom left corner to make this process easier.

That's it for part two. Next time we will set up the presentation in a loop so that it can run anywhere without someone having to watch over it.

Windows Media Player afspeellijst als achtergrond bij een PowerPoint voorstelling (PPT 2007)
 - deel 2 

Nu de afspeellijst geselecteerd is en deze automatisch zal afspelen gaan wij de animatie wat bijstellen.
  1. Activeer het taakvenster 'Aangepaste animatie' (indien niet zichtbaar, klik in het lint op het blad 'Animaties', kies in de groep 'Animaties' voor de knop 'Aangepaste animatie').
  2. Dubbelklik op de animatie van de afspeellijst.
    Opgelet, kies voor het item afspelen en niet voor het item onderbreken.
  3. Klik op het tabblad 'Effect' en kies het keuzerondje 'Na' bij de rubriek 'Afspelen stoppen'. Vul minimaal het totaal aantal dia's uit de presentatie in. Of typ het maximum van 999 in zodat de muziek niet zal stoppen ook niet als die zal herhaald worden.
Hoe kunnen wij nu het zwarte object kwijtraken. Twee mogelijkheden: ofwel verklein en sleep je het object op de plaats waar je dat wenst.

Of je verkleint het object en sleept het in de grijze zone rondom de dia. Om dat wat makkelijker te maken kan je met de zoomschuifregelaar onderaan het scherm wat uitzoomen.

Tot zover voor deel 2. In het derde deel laten wij zien hoe de voorstelling automatisch te laten lopen en herhalen.

woensdag 22 augustus 2007

Een PowerPoint show met Windows Mediaplayer afspeellijst in achtergrond - deel 1 (PPT 2007)/PowerPoint show with Windows Media Player playlist in background - part 1

Windows Media Player list as background to a PowerPoint show (PPT 2007).

Often I get the question how to play a music tune in the background of a PowerPoint show. Well you can also use a Windows Media Player playlist with several music tunes if you want. Other playlists created with WinAmp for example can also be used. Here's how.

Part 1
Create your playlist in Windows Media Player, if you do not know how to do this have a look here:
Create Windows media Player playlist

Once you have done this, open your slideshow, and do the following:
  1. On the 'Insert' ribbon click the 'Sound button' in the 'Mediaclips' group.
  2. Choose 'Sound from file'
  3. Navigate to the folder containing your playlist, should look like something like
    C:\Users\Your name\Music\Playlists
  4. Make sure you have 'All files (*.*)' selected in the drop-down type of file list. If you don't nothing will show up.
  5. Select your playlist.
  6. Click OK
  7. Click on 'Start Automatically'.
  8. The following object will appear.


Don't worry that it is in the middle of your slide. We will take care of that later.
First we will give the object the needed animation settings to make it play across several slides.
That will be for the next time, though, time to please the Dutch readers first.

Windows Media Player afspeellijst als achtergrond bij een PowerPoint voorstelling (PPT 2007).

Ik krijg geregeld de vraag hoe je een enkel muzieknummer over verschillende dia's of over de volledige show kunt laten doorspelen. Wel je kan in PowerPoint 2003 en 2007 een afspeellijst gecreĆ«erd in Windows Media Player afspelen in de achtergrond.

Deel 1
Maak je afspeellijst in Windows Media Player. Als je niet weet hoe dat moet kijk dan eens op de volgende link:
Aanmaken afspeellijst Windows media player

Eens dat achter de rug, doe je het volgende om de afspeellijst te gebruiken:
  1. Kies op het lint de tab 'Invoegen', klik op de knop 'Geluid' in de groep 'Mediaclips'.
  2. Kies voor 'Geluid uit bestand'.
  3. Navigeer naar de map met de afspeellijst, zou er ongeveer zo moeten uitzien:
    C:\Gebruikers\Je naam\Muziek\Afspeellijsten
  4. Zorg ervoor dat 'Alle bestanden (*.*)' is geselecteerd in de lijst. Anders verschijnt er niets in de lijst.
  5. Selecteer je afspeellijst.
  6. Klik OK
  7. Klik op knop 'Automatisch'.
  8. Het volgende object zal verschijnen op je dia:

Maak je geen zorgen over het feit dat het object in het midden van je dia staat en eventueel andere objecten bedekt dat gaan wij later wel oplossen.

Eerst gaan wij het object de nodige instellingen bezorgen zodat de afspeellijst over verschillende of alle dia's speelt.

Dat zal behandeld worden in deel 2.

donderdag 5 juli 2007

Apply motion paths to Autoshapes (4)/Animatiepaden toepassen op AutoVormen (4)

Motion paths applied to AutoShapes (part four)

This time we animate a rectangle AutoShape, we apply an animation path to it so that it covers up another shape. The path is reversed so that the shape appears again. The timing is adapted using the advanced time line. You will need a solid background colour to make this work. The rectangle follows the background fill and has no line fill.

Animatiepaden toegepast op AutoVormen (deel vier)

Deze keer wordt een AutoVorm gebruikt waar het animatiepad omlaag is op toegepast. Het pad wordt vervolgens automatisch omgekeerd. Op deze manier verdwijnen de letters om vervolgens terug te verschijnen. De timing van de verschillende paden wordt scherper gesteld via het geavanceerd tijdschema.
Dit werkt enkel met een effen achtergrondkleur. De rechthoek volgt de achtergrondkleur en krijgt geen rand.

zaterdag 16 juni 2007

Apply motion paths to make an anagram/Animatiepaden toepassen voor een anagram

Motion paths applied to textboxes (part six)

This is sample six. A bit of fun transforming a word, letter by letter into another word. Anagrams are fun.
Enjoy

Animatiepaden toegepast op tekstvakken (deel 6)

Voorbeeld zeven van geanimeerde tekstvakken. Een woord wordt letter per letter omgezet naar een ander woord. Of hoe je je kan amuseren met een anagram.

zondag 10 juni 2007

Apply motion paths to AutoShapes (3)/Animatiepaden toepassen op AutoVormen (3)

Motion paths applied to AutoShapes (part three)

This is sample three of an AutoShape animated with a motion path. This time we combine the motion path 'Square' with the entrance effect 'Dissolve'.

Animatiepaden toegepast op AutoVormen (deel drie)

In dit derde voorbeeld wordt een rechthoek in combinatie met een aantal tekstvakken geanimeerd. Het animatiepad vierkant wordt gecombineerd met het ingangseffect 'Oplossen in'. 

dinsdag 29 mei 2007

PowerPoint show on your desktop - PowerPoint presentatie op je desktop (PPT 2003)

Is it possible to use a PPT-presentation on your desktop as a screensaver?

Yes it is, here's a link to Glen Millars PowerPoint site where he explains the whole procedure.
Glenn Millar is an PowerPoint MVP from Australia, and he has an excellent site. Glen is a PowerPoint animation wizard. You will find lots of samples of his work, it is really impressive.
Screensaver presentation

Is het mogelijk om een PowerPoint presentatie als een soort van screensaver op je bureaublad af te spelen?

Ja, dat is mogelijk. Omdat dit een nogal uitgebreide procedure is ga ik die niet hier uiteenzetten maar verwijzen naar de site van Glenn Millar (PowerPoint MVP).
Bij iedere stap staat een screenshot. Veel plezier ermee.

Screensaver presentatie

dinsdag 22 mei 2007

Play and stop music in a presentation/Afspelen en stoppen van muziek tijdens presentatie (PPT 2003)

When using sound files in Power Point 2003 there seems to be no way of
stopping the sound, when playing the slide show. How do you do that?


A question I got some time ago.
  1. After inserting the sound file choosing to play on click, activate the custom animation task pane.
  2. Select your sound icon on the slide.
  3. Click on add effect, choose 'Sound actions', select stop.
  4. Now move the entry using the arrows up/down so that it is positioned under the play action. This will allow you to start and stop the sound on click.

    If you insert the sound file and let it play automatically, then add the stop action as described, double click on it in the custom animation task pane, choose Timing tab, click the Triggers button. Change to "start effect on click of" and choose the music from the drop down list. The music will now stop when you click the icon.
Is er een mogelijkheid om een geluidsbestand tijdens de presentatie gewoon stop te zetten door te klikken op het pictogram met het luidsprekertje?

Een vraag die ik een tijdje geleden voorgelegd kreeg.
  1. Voeg het geluid in via Invoegen - Films en geluiden - Geluid uit bestand - kies voor 'Wanneer er wordt op geklikt'.
  2. Activeer het taakvenster 'Aangepaste animatie'. Selecteer het geluidspictogram op je dia.
  3. Kies 'Effect toevoegen', selecteer 'geluidsacties', kies stoppen.
  4. Gebruik nu bij 'volgorde wijzigen' onderaan het taakvenster de pijl en plaats de actie juist onder de afspeelactie. Dit zal je toelaten om tijdens de presentatie het geluid stop te zetten of te starten door te klikken op het geluidspictogram.


Kies je bij het invoegen van het geluid voor 'Automatisch' voeg dan de actie stoppen toe zoals hierboven beschreven. Dubbelklik erop in het taakvenster, kies tabblad tijdsinstelling, bij activeringsmethode selecteer je het geluid in de lijst naast 'Geluid laten beginnen bij klikken op'. Zo kan je het geluid stoppen.


donderdag 17 mei 2007

Apply animation paths to AutoShapes (2)/Animatiepaden toepassen op AutoVormen (2)

Animation paths applied to AutoShapes (part two)

In this second sample the first rectangle appears with the entrance effect 'faded zoom'.
Then four other rectangles appear from the top of the slide and move down till they are positioned under the first one.
The motion paths are locked so that you can move the shape independently from the path.

Animatiepaden toegepast op AutoVormen (deel twee)

In het tweede voorbeeld met AutoVormen worden vijf rechthoeken met tekst geanimeerd. De eerste rechthoek verschijnt met het ingangseffect 'Vervaagd in- en uitzoomen'. De overige vier worden met een animatiepad automatisch van buiten de dia tot onder de eerste rechthoek gebracht. De animatiepaden zijn vergrendeld zodat je de vorm onafhankelijk kunt verplaatsen van het pad.

Apply motion paths to AutoShapes (1)/Animatiepaden toepassen op AutoVormen (1) (PPT 2003 - PPT 2007 - PPT 2010)

Motion paths applied to AutoShapes

First sample of motion paths applied to an AutoShape with text.
There are four rectangles with text which appear automatically. The motion path exits three of them, only one remains. The text is then emphasized with a different colour using the animation effect color wave.

Animatiepaden toegepast op AutoVormen

Eerste voorbeeld van een animatiepad dat is toegepast op een vorm met tekst.
Er zijn vier rechthoeken met tekst, zij verschijnen automatisch, vervolgens worden er drie met een animatiepad buiten de dia gestuurd. Het laatste vak blijft staan in het midden van de dia en wordt voorzien van een nadrukeffect, kleuren golven.