Posts tonen met het label crop picture. Alle posts tonen

28 februari 2021

Zoom in on a photo in a placeholder using the crop function - PPT 2019

For this example I created a new slide layout in the master and added two picture placeholders. If you want to do that go to View - Slide master - click on the Insert layout button - choose the Insert placeholder button and select Picture. Drag two placeholders for pictures next to each other. Close the master by clicking on the Close master view button.

Now make a new slide in your presentation using the new slide layout.


Add the photo you want to zoom in on in the placeholder by clicking on the icon in the middle of the placeholder. Navigate to the folder containing your photo and insert it in both placeholders.

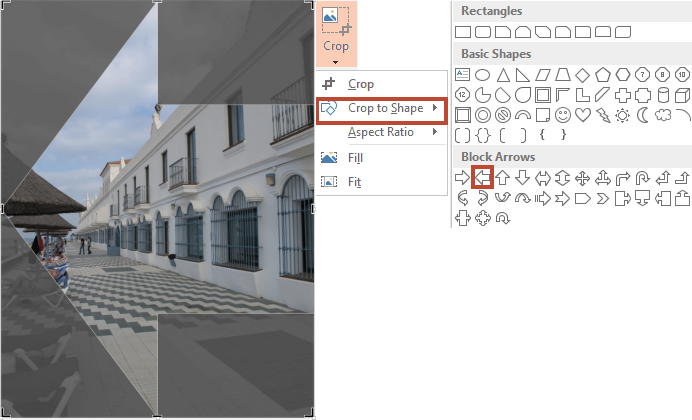
To zoom in, select the placeholder, under Picture tools click Format tab and in the size group click the crop button and choose crop.


Now enlarge the area of the placeholder:


Click and drag in the photo to center it inside the original placeholder.


Click outside the placeholder, the photo is larger and still remains between the original placeholder borders.

06 augustus 2018

Crop a picture to a circle shape

If you want to crop a picture to a circle shape seems only the oval shape is available.
You can adjust the format though.

Insert your picture and crop using the Crop button in the Size group on the Format tab.


After cropping click the dialog starter button in the bottom right corner of the Size group.

Click the picture button and the crop option.

Under Crop position, enter the same size next to width and height.


10 april 2016

Crop pictures in PowerPoint 2013 (2)

In my previous article I discussed cropping with the handles. You can also crop a picture based on a shape.

After clicking the Crop button, choose Crop to shape and click the shape you want to use.
In the example below I used the Arrow left shape.


It is possible to adjust the arrow using the little yellow handles that appear:

You can also crop a picture to the aspect ratio you want, in the example I cropped to a square 1:1.


Finally you can use the Fill and Fit options. When you draw a shape and fill it with a picture in the background, distortion could be your share. These two options allow you not to distort the image, but you have to take into account that some parts of the picture may be missing.

Here's a sample of a picture that has been added as a background to the heart shape.


Click CropFill, now the picture has no distortion and the aspect ratio is correct. Some parts of the original picture are no longer there.


Or click Crop, Fill, aspect ratio is respected, the whole picture is there. Depending on the shape you use this may be what you want or not.


02 april 2016

Crop pictures in PowerPoint 2013

Many times you do not need the whole picture in a presentation. In previous blogs I treated a number of possibilities to use part of a picture. The crop function was one of them. Lets elaborate on the possibilities.

You can find the Crop button in the Size group under Picture tools, Format tab.


Eight handles appear letting you crop the picture. Place your cursor on a handle and drag. During the operation the cursor will take the shape of a plus sign. You can drag with the handle in the middle of a side, a corner handle or while holding the ctrl key.

Drag a handle in the middle, one side is cropped:


Drag a  middle handle with Ctrlboth sides equally cropped:


Drag a corner handle, proportionally crop on two sides:


Drag a corner handle with Ctrl, all 4 sides are equally cropped: