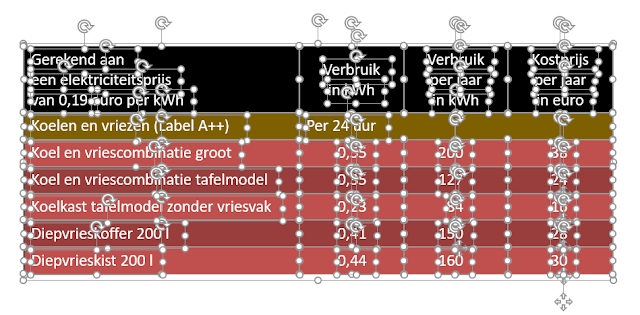
When you use Morph you do not need any animation. The table below is the same as in my articles on animating tables. The purpose is to morph it row by row. If you want to try it yourself download the file here.
If you look in the selection pane (ALT+F10) you can see that it is a table.
First select the table, click copy and then Paste special as an enhanced metafile. Remove the original table.
In the selection pane the table has turned into a picture.
In the selection pane you can see all the individual parts of the table. There are a number of lines and an Autoshape surrounding the table. Select them in the selection pane using Ctrl+click and press delete when you are done. This will make your task easier when we need to regroup later.
The selection pane now looks like this.
The remaining group now needs to be ungrouped again to leave us with individual objects. The result looks like this:

Now copy the first slide as many times as needed, right-click the slide and choose Duplicate slide. On each slide select and remove the superfluous rows. Below you can see the selected rows on slide two.
As a last step select slides 2-6 and apply the Morph transition using the Transition tab and the Morph button.
See the result in the video below:
In the next video you can see the result when only the rectangles with text are selected in the second but last row. In the Effect options choose the Characters option.


Geen opmerkingen:
Een reactie posten