Use multilevel outline numbering in PPT 2003-2010
It is time to post an update.
Well, unfortunately nothing has changed in the current versions of PPT, no multilevel numbering added. If you want the real multilevel numbering you still have to use a Microsoft Word object. Skip to item 3 below if that is the case. If you do not want to use automatic numbering and want to do it manually stick with item 1 or 2 below.
You can apply different bullets or numbers/letters to each individual level. You do that in the master of the presentation (Figure 1), go to View and click Master click in each level and choose the numbering button on the Home tab to apply the style you need. Below (Figure 2) I have adjusted the indents on the ruler to have the letter align perfectly with the previous level.
 |
| Figure 1: Master of the presentation |
Click in the placeholder and use the tab key to choose a lower level or shift+tab for a higher level.
 |
| Figure 2: Example of a slide with the master applied |
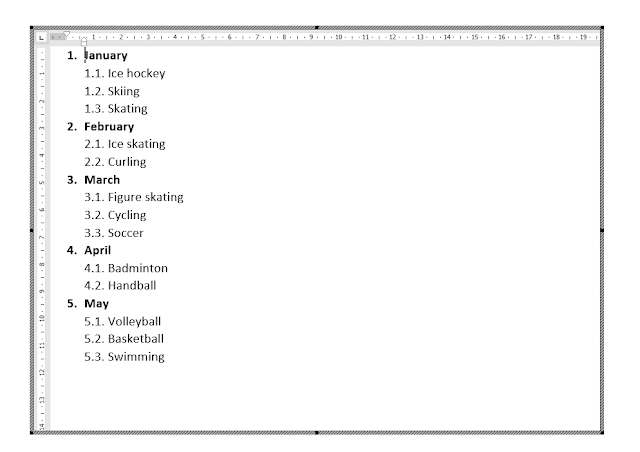
But you cannot create an outline like this one:
1.
1.1.
1.1.1.
2.
2.1.
2.2.
2.3.
3.
3.1.
3.2.
If you still want to use true multilevel numbering you will have to use Word as a workaround.
Here's what you do:
- Type your outline in Microsoft Word 2016/2019 using the multilevel level numbering button on the Paragraph group of the Home tab and select the multilevel numbering style.

- Give it the formatting you need.
- Now select the complete list and click the copy button on the Home tab.
- In PowerPoint paste the selected list in the Empty layout, you have three possibilities:
Click the down arrow under the Paste button and choose the Paste as picture icon
As you can see in the sample below (Figure 3) pasting as a picture is a true reproduction of the original list. You can only enlarge/shrink and move the picture. Editing of course is not possible.
2 Paste unformatted text (partially editable)
Click the down arrow under the Paste button and choose the Paste as plain text icon.
Pasting as plain text, gives you a list with numbers and text flush aligned. PPT uses the default tabs which are an inch apart.
To make the list appear as the original in Word you have to select the complete list and add a tab stop in the ruler. Then click in front of every second level number and press the Tab key of your keyboard.
You can edit the list in a very limited way (Figure 4), adding a first level number is possible by positioning your cursor and pressing enter. Second level numbers will have to be added/changed manually. Not really a prospect to look out for, so avoid it if possible. See the example below.
 |
| Figure 3: different ways of pasting |
 |
| Figure 4: edit the list |
Pasting as plain text in a placeholder is also possible. For instance in the Title and object layout. This gives you the following result:
As you can see PPT pastes the text as expected but every paragraph is preceded with a bullet. That is the default in the master.
As you can see PPT pastes the text as expected but every paragraph is preceded with a bullet. That is the default in the master.
To get rid of the bullet click on the placeholders border and click on the numbering button in the paragraph group of the Home tab. To obtain the original look of the list you will have to use the same technique as described above, add tab stop(s)/indents and use your keyboard tab key to align the text. The formatting you applied in the Word outline is gone (bold numbers and text on level 1) which is to be expected as we pasted as unformatted text.
Life gets more complicated when text in the original outline has more than one line. This video shows you what to do after you paste as plain text.
3 Paste as Microsoft Word document (fully editable)
Click the down arrow under the Paste button and choose Paste special, Microsoft Word-document object.
Click the down arrow under the Paste button and choose Paste special, Microsoft Word-document object.


