dinsdag 24 november 2020

Tekstkolommen gebruiken in tekstvakken, tijdelijke aanduidingen en vormen - PPT 2019

Net als in Microsoft Word kan je in PowerPoint gebruik maken van tekstkolommen. Dit kan zowel in tijdelijke aanduidingen op de standaard dia-indelingen als in zelf getekende tekstvakken of zelfs in getekende vormen.

Je kan eerst de tekst intypen en dan pas in kolommen verdelen of eerst in kolommen verdelen en dan pas intypen. Helaas is er geen mogelijkheid om de kolom zelf te beƫindigen met een kolom einde zoals in Word.

Tekstkolommen in tekstvakken

Met je cursor in het getekend tekstvak, klik in het lint start op de knop Kolommen toevoegen/verwijderen in de groep Alinea.

Kies voor Twee of drie kolommen.

Zoals hieronder te zien is krijg je standaard weinig afstand tussen de kolommen.
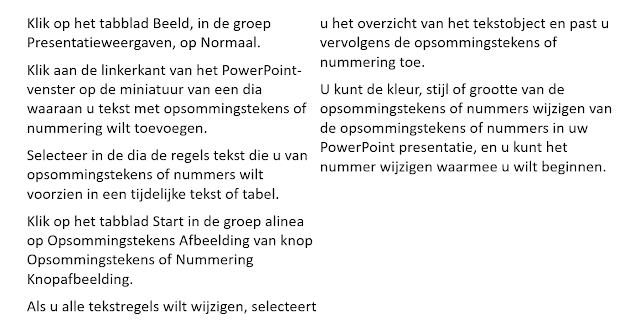
Zelf getekend tekstvak met twee kolommen zonder extra tussenruimte

Wil je die wel dan moet je kiezen voor de optie
Meer kolommen en bij Afstand de ruimte instellen.
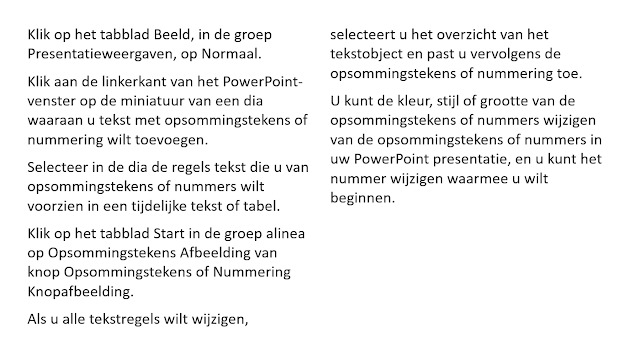

Zelf getekend tekstvak met extra marge


De tekengrootte bij tekstvakken is standaard 18 pt en de optie formaat van vorm aanpassen aan tekst is actief, met andere woorden het vak verhoogd naarmate er tekst wordt toegevoegd.

Tekstkolommen in tijdelijke aanduidingen
 
Bij tijdelijke aanduidingen op de ingebouwde dia-indelingen is de tekengrootte standaard ingesteld op 28 pt en de optie Tekst kleiner maken is actief. Dat kan tot gevolg hebben dat de tekst uiteindelijk automatisch verkleint wanneer hij niet meer past in het tekstvak. 
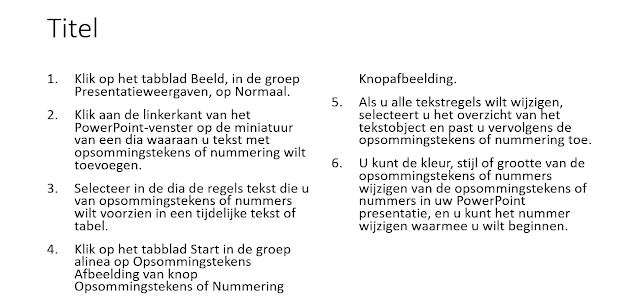
Twee tekstkolommen in een tijdelijke aanduiding


Zoals je ziet is de tekst automatisch kleiner geworden, in plaats van 28 pt krijg je hier nu 22 pt.

Je kan dit voor zowel getekende als standaard tekstvakken uitzetten, klik rechts op de rand van je tekstvak/tijdelijke aanduiding en kies Positie en grootte. In het taakvenster aan je rechterkant kies je eventueel de knop Grootte en eigenschappen (1) en vervolgens klik je op het pijltje naast Tekstvak (2) en activeer je het keuzerondje AutoAanpassen niet gebruiken. Je zelf getekend tekstvak behoudt dus zijn getekende grootte en de tekst in het tijdelijk tekstvak verkleint dus niet automatisch meer.


Tekstkolommen in getekende vormen

Ook bij getekende vormen kan je tekstkolommen instellen. Standaard wordt ingetypte tekst verticaal en horizontaal gecentreerd in de vorm. De tekengrootte bij getekende vormen is standaard 18 pt en de optie AutoAanpassen niet gebruiken is actief, met andere woorden je kan tekst toevoegen zelfs buiten de grenzen van de vorm.


Zie het onderstaande voorbeeld:
Na het indelen in kolommen krijg je het volgende resultaat:

Vooral in de cirkel is het resultaat bedroevend. Wanneer je de tekst links laat uitlijnen via de knop Uitlijnen op het lint Start valt het beter mee. Soms zal je ook de verticale uitlijning (zie afbeelding hierboven) in het tekstvak via het taakvenster vorm opmaken op Boven moeten instellen. Bij de cirkel blijft het resultaat problematisch. Komt daarbij ook dat je in PPT de woorden niet kan afbreken wat bij langere woorden aanleiding geeft tot afgebroken woorden en grote witruimten.


Hieronder een paar voorbeelden waar gebruik is gemaakt van tekstkolommen.
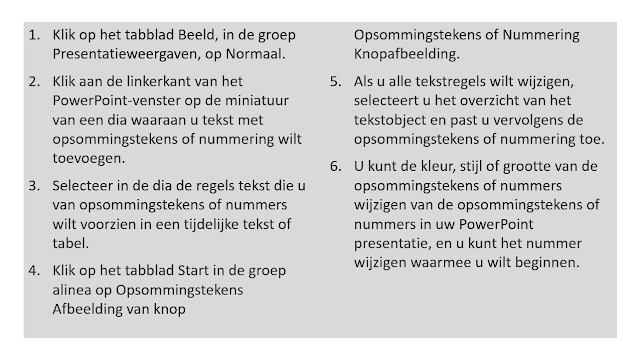
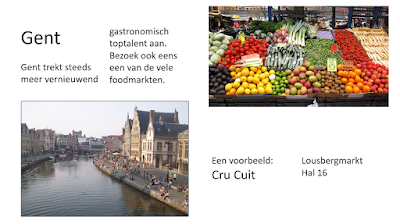
Opgesomde tekst in zelfgetekend tekstvak met twee kolommen


Twee zelfgetekende tekstvakken met kolommen op een lege dia-indeling


donderdag 19 november 2020

Use text columns in text boxes, placeholders and shapes - PPT 2019

As in Microsoft Word you can use text columns in PowerPoint. You can do this in placeholders, in slide layouts or text boxes, you can even use them in AutoShapes.

You can either type the text first and add the columns later or set the columns first and type the text later. Unfortunately you can't end a column like in Word where you have a column break function. 

Text columns in text boxes

With the cursor in the text box, click on the Add columns button in the Paragraph group of the Home tab.

Choose Two or Three columns.


As you can see in the example below there is not enough space between the columns:

If you want extra space between columns you have to choose More columns item at the bottom and adjust the spacing.


User drawn text boxes by default have a font size of 18 points, the option to resize shape to fit text is active. In other words the box will expand as you type text in it.

Text columns in placeholders

Same procedure as above. With placeholders the default font size is 28 points and the option Shrink text on overflow is active. This means that text will automatically be reduced in size when it no longer fits in the placeholder. Shrink to fit can lead to different text sizes on consecutive slides which does not look professional.

Numbered paragraphs in a two column placeholder


As you can see the text has been reduced automatically to a size of 22 points.

You can change the defaults by right-clicking the placeholder/text box and choose Size and position. In the taskpane click the Text options button. Under Tex box check the radio button Dot not autofit. The text box you draw retains its original shape and the text in the placeholder will not shrink. As a bonus you will not type too much text in a placeholder, which is never a good idea in PPT.


Text columns in Auto Shapes

If you use columns in AutoShapes you will need some extra formatting to get what you want. By default text is horizontally and vertically centered in shapes. AutoShapes by default have a font size of 18 points, the option Do not Autofit is active. In other words you will be able to type as many text you want even if it exceeds the limits of the shape.


As you can see in the following example this can be a problem especially in the circle.
When you align the text to the left using the Align button on the Home tab results are better. You will also have to align the text vertically. Using the format shape task pane you can align the text at the top of the shape. 
The circle shape still is not perfect though and will require a reduced font size. The problem gets worse with long words, PPT does not allow hyphenation so you may end up with broken up words or very large gaps between words.
.


A few examples of text columns:

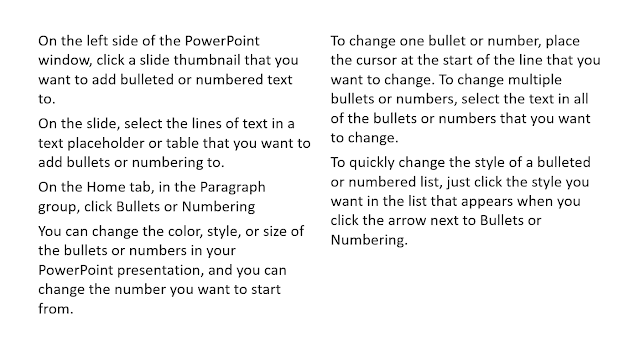
Numbered paragraphs in a two column text box


Two text boxes with text columns


donderdag 12 november 2020

Remove slide layout from master not possible in PPT 2019?

Ever wanted to delete a slide layout in the master and come to the conclusion that you can't?

The reason is simple the slide layout is in use in your presentation. You can check this by hovering the mouse pointer over a slide layout, a pop-up will show which slides use the layout. In a brand new presentation you can delete all the slide layouts except for the first one Title slide. That is normal as every new presentation has at least one slide, so the title slide is in use and cannot be deleted.

Below is an example of a custom slide layout displaying the pop-up.


So if you want to delete the slide layout the option is greyed out.


You can also check in the presentation. If you click the Layout button on the Home tab you will see which layout has been applied to the slide. In our example slides 7-10).


To remove the slide layout you will have to apply another layout to the four slides. This will have implications, for example the arrow on the slides will disappear. The centered text will be aligned to the left. So select the slides and apply the new layout, here I have applied the Empty layout.


Now you can delete the slide layout in the master.

woensdag 4 november 2020

Verwijderen van dia-indelingen uit diamodel lukt niet - PPT 2019

Al eens vastgesteld dat je een bepaalde dia-indeling niet kunt verwijderen in het diamodel?

Dat wijst op het feit dat de betrokken dia-indeling in gebruik is in de presentatie. Dat kan je controleren in de presentatie of je kan met de muis over de dia-indeling bewegen in het diamodel en een pop-up zal je tonen of de dia-indeling effectief in gebruik is. 

Bij een nieuwe presentatie zal je constateren dat alle dia-indelingen kunnen verwijderd worden behalve de eerste titeldia indeling. Dat is normaal aangezien iedere nieuwe presentatie start met minimaal Ć©Ć©n titeldia die is dus in gebruik en kan bijgevolg niet verwijderd worden. Hieronder zie je een voorbeeld van een zelfgemaakte dia-indeling in het diamodel.


Als je dan probeert om de indeling te verwijderen dan blijkt dat dit niet kan, de optie Indeling verwijderen is grijs.

Als je in je presentatie de dia's (7-10 in het voorbeeld) bekijkt en klikt op de knop Indeling zie je dat die inderdaad aan die bewuste dia-indeling zijn gekoppeld.


Om de dia-indeling te verwijderen zal je op de vier bewuste dia's eerst een andere dia-indeling moeten toepassen. Dit zal implicaties hebben voor de betrokken dia's, in het voorbeeld hieronder zie je dat de pijl bijvoorbeeld verdwenen is en de gecentreerde titels staan nu links.

Selecteer de vier dia's, klik op de knop Indeling en kies een andere indeling, in mijn geval heb ik gekozen voor de indeling leeg.


Nu kan de indeling verwijderd worden in het diamodel.