31 mei 2022

Linken naar dia in PPT 2021

Heb je feedback nodig van een collega bij een dia of presentatie? Je kan nu een link delen door rechts te klikken op de dia en te kiezen voor Koppeling naar deze dia.

Klik in het dialoogvenster op de knop KopiĆ«ren, klik op het pijltje naast 'Iedereen kan editeren' en bepaal zelf of iedereen of enkel bepaalde personen kunnen editeren. Geef een verloopdatum of paswoord op indien nodig. 

De gekopieerde link kan je gebruiken in een email, Teams, chat en dergelijke.

Opgelet ! De ontvanger van de link heeft toegang tot de volledige presentatie, bij het gebruiken van de link komt hij/zij terecht op de gekozen dia.

21 mei 2022

Link to slide in PPT 2021

Need feedback on a slide or presentation? You can now right-click a slide and choose Link to this slide.


This will give you the following share screens, click Copy and then click on the arrow next to anyone... to decide whether anyone can edit or only specific people. Set an expiration date or password if necessary:


You now can use the copied link in an email, chat or Teams. Be aware that your colleague or correspondent will gain access to the complete presentation. Upon using the link he/she will end up on the slide you chose.

14 mei 2022

Use non breaking space in PPT 2019

It can be useful to use a no-break space in a text box in PPT. This way you can avoid that words or abbreviations are improperly distributed over several lines.

Use a symbol

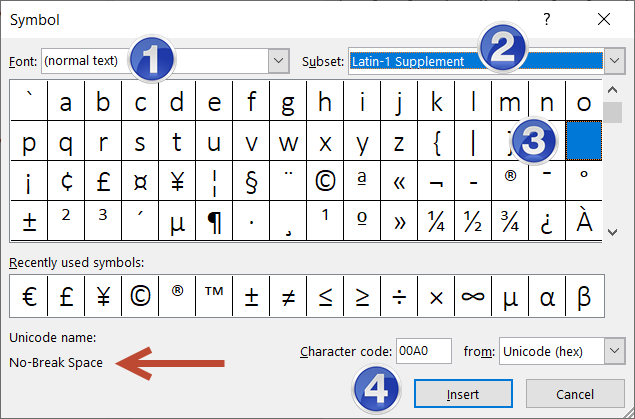
Choose Insert - Symbol - Font Normal - Subset Latin-1 supplement - Select the character no break space and click Insert and then Close.


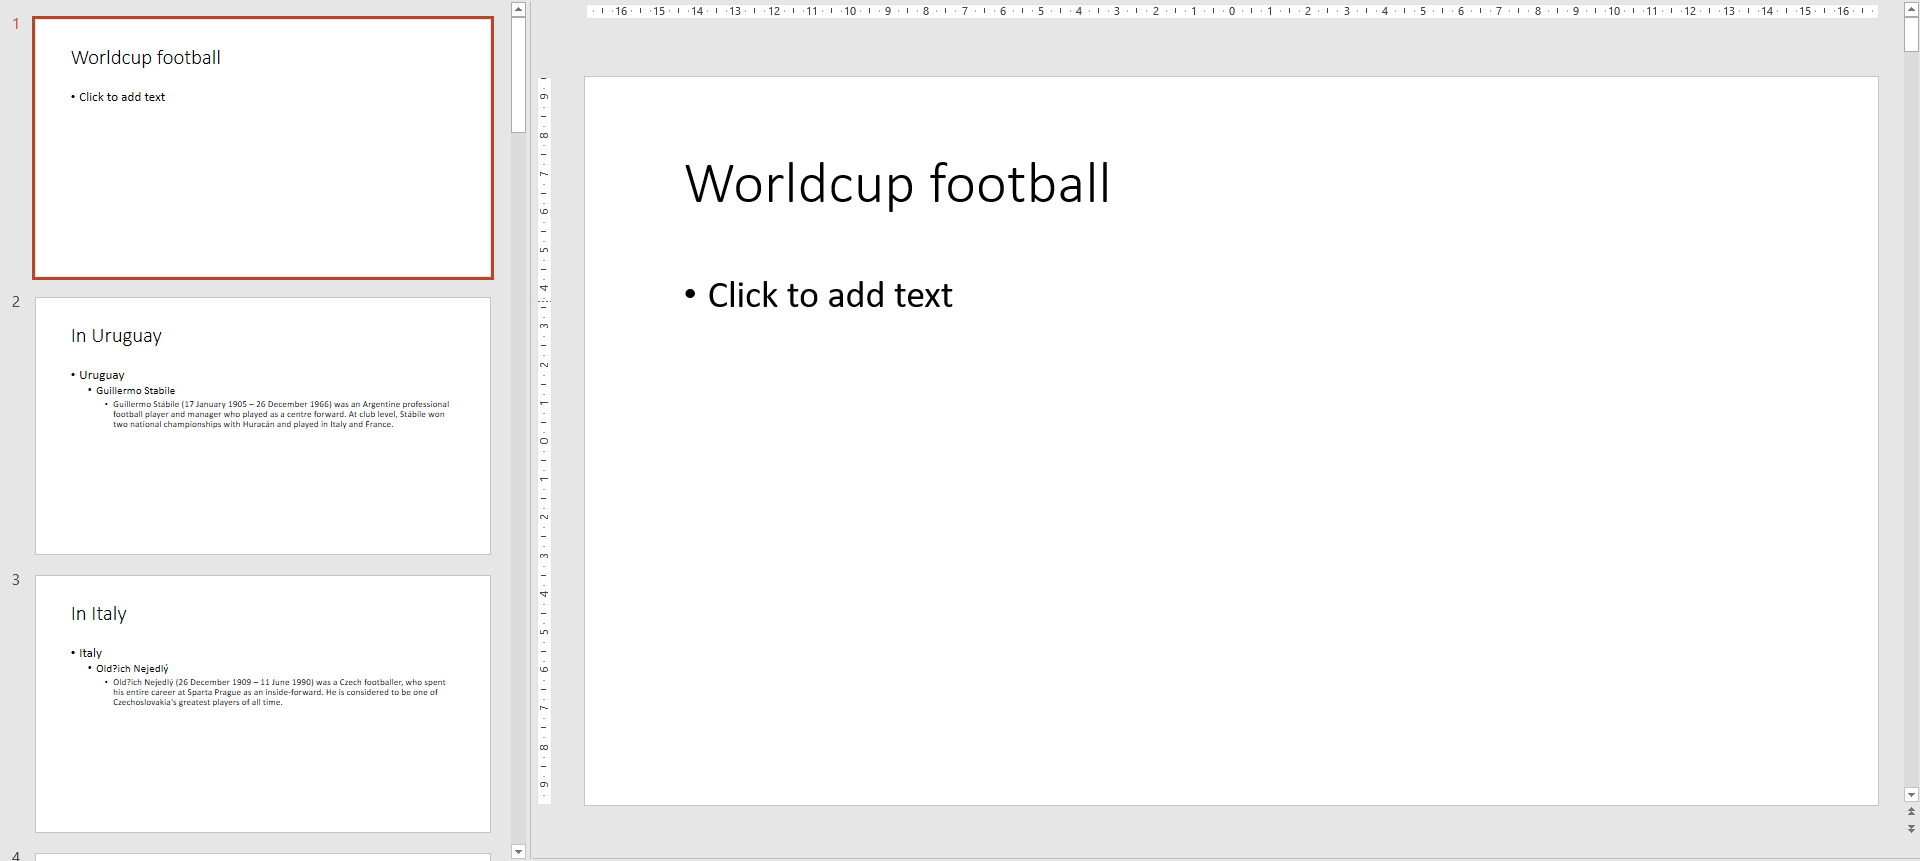
In the example below the space between the abbreviated first names has been replaced with a no-break space. So J. K. is considered as one indivisible word. If it does not fit the end of the line it will be completely transfered to the next line.


Use a keyboard combination
Hold down the ALT-key and key in 0160 on your numeric pad, release the Alt key.


09 mei 2022

New icons and illustrations in PPT 2021

Starting with PPT 2021 there are more possibilities to use illustrations, icons. These are included in the new Picture button on the ribbon. Click Insert - Picture - and choose the new item Stock pictures.

Now you can choose from a few categories: images, icons, callout people, stickers, videos, illustrations and cartoon people. All of the options are further devided into several subcategories.

The images are free for use in PPT.


There is an expanded set of icons. You can also still get at them using Insert - Icons on the Insert tab.

The cutout people tab contains png images of people. They all have a transparent background. 

The stickers tab is completely new and contains some funny cartoon like pictures. Not to use in a professional environment though.

The video tab is new also. These are small videos which loop until stopped.

The illustrations tab contains illustrations in grey scale with a yellow popup. The yellow popup can have another colour, select the illustration click on the Graphics format tab and choose Graphic fill, then choose your new fill. See the example below:

Illustrations are svg files which means they are defined by an equation. You can change these by converting them to a PPT object. Illustrations have the same behaviour as icons to change them see my article: Use and change icons in PPT

Svg stands for Scalable Vector Graphics. These are high quality images that can be scaled to any size without losing quality. No pixelation whatsoever. On top of that they are much smaller in size.

Finally the last category is cartoon people. In this category you can assemble your own cartoon character. Below is an example:


22 april 2022

Convert an Excel outline to a PPT presentation in PPT 2019

I already explained how to use a Word outline in PPT. See the link below:

Use a Word outline in PPT

But can you do the same with an Excel file?

Yes you can, but the Excel file must meet a number of conditions.

For every new slide you need a cell in column one.
For every bullet point of the second level you need a cell from column 2. And this cell must be below the first one and on the next row.
For every bullet point of the third level and so on you need a different column and always under the previous level.

Here's an example of an Excel file:


In Excel you must save the file as a text file by choosing Text (tab delimited) in the save as box (*.txt).


In PowerPoint
Start a new presentation. On the Home tab click the list arrow next to the New slide button. and choose Slides from outline.


Select your *.txt file and insert it. Be sure to select Outlines in the list so you can see your text file.

Here is the result when such a file is opened in PPT.


After some adjustments to the master this is what it looks like:


12 april 2022

Add a watermark to a picture placeholder on the master in PPT 2019

If you add a picture placeholder to a slide layout in the master you can use a background consisting of a picture or text.
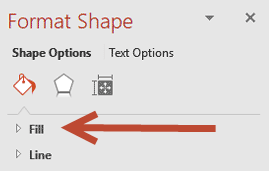
Right click the picture placeholder and choose Format shape. Click on the Fill option in the taskpane:


and choose Picture or texture fill, click Insert
 

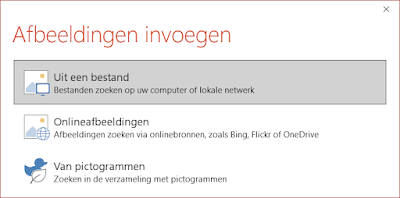
Choose one of the categories, browse and insert your picture:


Now that the picture is inserted adjust the transparency using the slider.


Close the master by clicking on the Close master button.

Create a new slide using the new layout from the master.

See the example below where I inserted the company logo in the placeholder or a watermark text. I created the watermark text in PPT by inserting a rotated text box and saving it as a svg file.

It may be necessary to adjust the colour of the text or the prompt in the placeholder to secure readability.

Empty  master placeholder


Master placeholder with transparent picture


Master placeholder with transparent watermark

01 april 2022

Watermerk gebruiken in tijdelijke aanduiding voor afbeeldingen in diamodel van PPT 2019

Wanneer je gebruik maakt van een tijdelijke aanduiding voor afbeeldingen in het diamodel kan je de tijdelijke aanduiding een achtergrond geven met een afbeelding of tekst.

Ga naar Beeld - Diamodel en rechtsklik op de tijdelijke aanduiding voor een afbeelding, kies uit het snelmenu Vorm opmaken. Kies in het taakvenster Vorm opmaken voor Opvulling:


Vervolgens voor Opvulling met afbeelding of bitmap (1) :


Klik op Invoegen (2) en selecteer een afbeelding via een van de categorieƫn.


Na het toevoegen van de afbeelding pas je de doorzichtigheid aan via de schuifbalk (3).

Sluit het diamodel af via de knop Modelweergave sluiten.

Maak een nieuwe dia aan met de diaindeling uit het diamodel.

Hieronder heb ik als voorbeeld een tijdelijke aanduiding voor afbeeldingen toegevoegd met het bedrijfslogo en met een watermerktekst. Het watermerk met de tekst heb ik aangemaakt via een geroteerd tekstvak dat als een svg afbeelding is opgeslagen.


Tijdelijke aanduiding zonder afbeelding

Tijdelijke aanduiding met afbeelding

Tijdelijke aanduiding met watermerktekst


23 maart 2022

Add your logo to your notes in PPT 2019

If you want to add your logo to your notes you will have to use the Notes master. The logo will show in the Notes view and will be printed.

Go to View - Notes master. On the master insert your logo. 


Make sure the logo is not on top of a placeholder. If it is send the logo to the back by selecting it and choosing the send to back button on the ribbon or right click the logo and select Send to back and Send to back again.


You can add other objects to the notes master, like pictures, clip art and others but always send them to the background.

Below you can see the enlarged logo on top of the placeholder and the same logo sent to the back.


Here's how the Notes Master looks with a normally sized logo:


Go to the Notes page view by clicking on the View tab and selecting the Notes Page button.


15 maart 2022

Voeg je logo toe aan je notitiepagina's in PPT 2019

Als je je bedrijfslogo wil toevoegen aan je notities dan moet je het notitiemodel aanpassen. Het logo zal opduiken in de notitieweergave en zal ook geprint worden.

Ga naar Beeld Notitiemodel. Voeg je logo toe.


Zorg ervoor dat het logo niet bovenop de tijdelijke aanduiding komt te staan. Wil je dit toch dan stuur je het logo best naar de achtergrond. Selecteer en klik in het lint onder Hulpmiddelen voor graphics op het tabblad Grafische indeling op de knop Naar achteren en kies Naar achteren. Of klik rechts op het logo en kies uit het snelmenu Naar achtergrond en opnieuw Naar achteren.

Je kan nog andere objecten toevoegen aan het notitiemodel zoals afbeelding, iconen of SmartArt. Maar ook hier stuur je ze best naar de achtergrond. Hieronder zie je een vergroot logo dat bovenop de tijdelijke aanduiding staat en een ander waarvan het logo naar de achtergrond is gezet.


Dit is hoe het notitiemodel eruit ziet met een normale grootte voor het logo:


Ga naar Notitiepagina weergave door op het tabblad Beeld te klikken en te kiezen voor de knop Notitiepagina.


03 maart 2022

Overzicht maken in Excel en omzetten in powerpoint presentatie - PPT 2019

Een overzicht uit Word gebruiken voor een PPT presentatie kwam al eerder aan bod in deze blog.

Maar kan je dat ook met een Excel bestand?

Wel ja, maar dan moet het Excel bestand aan een aantal voorwaarden voldoen.

Voor iedere nieuwe dia heb je een cel uit de eerste kolom nodig. 
Voor ieder opsompunt van het tweede niveau heb je een cel uit de tweede kolom nodig. En deze cel moet onder de eerste cel gepositioneerd worden in een andere rij dus.
Ieder verder opsomniveau hoort in een aparte kolom en altijd onder het vorige niveau.

Hieronder zie je een voorbeeld van een dergelijk Excel bestand.


In Excel sla je het bestand op als een tekstbestand met tab als scheidingsteken (*.txt).


In PowerPoint
Start een nieuwe presentatie. Op het lint Start klik je op het lijstpijltje naast de knop Nieuwe dia in de groep Dia's en je kiest voor Dia's uit overzicht.


Selecteer je txt bestand en voeg het in. Kies in de lijst voor Alle overzichten (*.txt,.rtf,.doc)


Bovenstaand voorbeeld van een Excel bestand ziet er in PPT zo uit:


Na wat aanpassingen aan het diamodel ziet het er zo uit:


15 februari 2022

Harde/vaste spatie gebruiken in PPT 2019

Het kan handig zijn om een harde spatie te gebruiken in een tekstvak in PPT. Zo kan je vermijden dat woorden of afkortingen onoordeelkundig worden verdeeld over meerdere regels.

Gebruik maken van 'invoegen symbool'

Kies Invoegen - symbool - lettertype normaal - deelverzameling latijn- 1 - uitgebreid - selecteer het teken no break space en klik op Invoegen en vervolgens op Sluiten.


In onderstaand voorbeeld is de spatie tussen de twee afgekorte voornamen vervangen. Daardoor wordt de J. K. beschouwd als ƩƩn ondeelbaar woord.

Toetsenbordcombinatie
Hou ALT-toets ingedrukt en tik op het cijferklavier 0160, laat dan ALT-toets los.